Wood Putty Miter Joints / The result is an extremely strong, totally concealed joint.
byAdmin•
0
Wood Putty Miter Joints / The result is an extremely strong, totally concealed joint.. Doing so ensures a tight fit. Then, install the shelves by putting glue in the rabbet joints and sliding the shelves into the joints, one shelf at a time (image 2). Once the fit is good, apply a thin bead of wood glue to mitered edges and nail in place with finishing nails. Box joints are strong and attractive, and with the help of our router table box joint jig, they're also straightforward to make. Drill pilot holes for the screws in each board and apply carpenter's glue to the cut ends to help seal the joints.
Drill pilot holes for the screws in each board and apply carpenter's glue to the cut ends to help seal the joints. With the shelves in place, add finish nails through the outside of the unit to hold the shelves in place (image 3). Place both boards back against the wall and check the join. Slide the fence against the blocks, and tighten it in place. Then, install the shelves by putting glue in the rabbet joints and sliding the shelves into the joints, one shelf at a time (image 2).
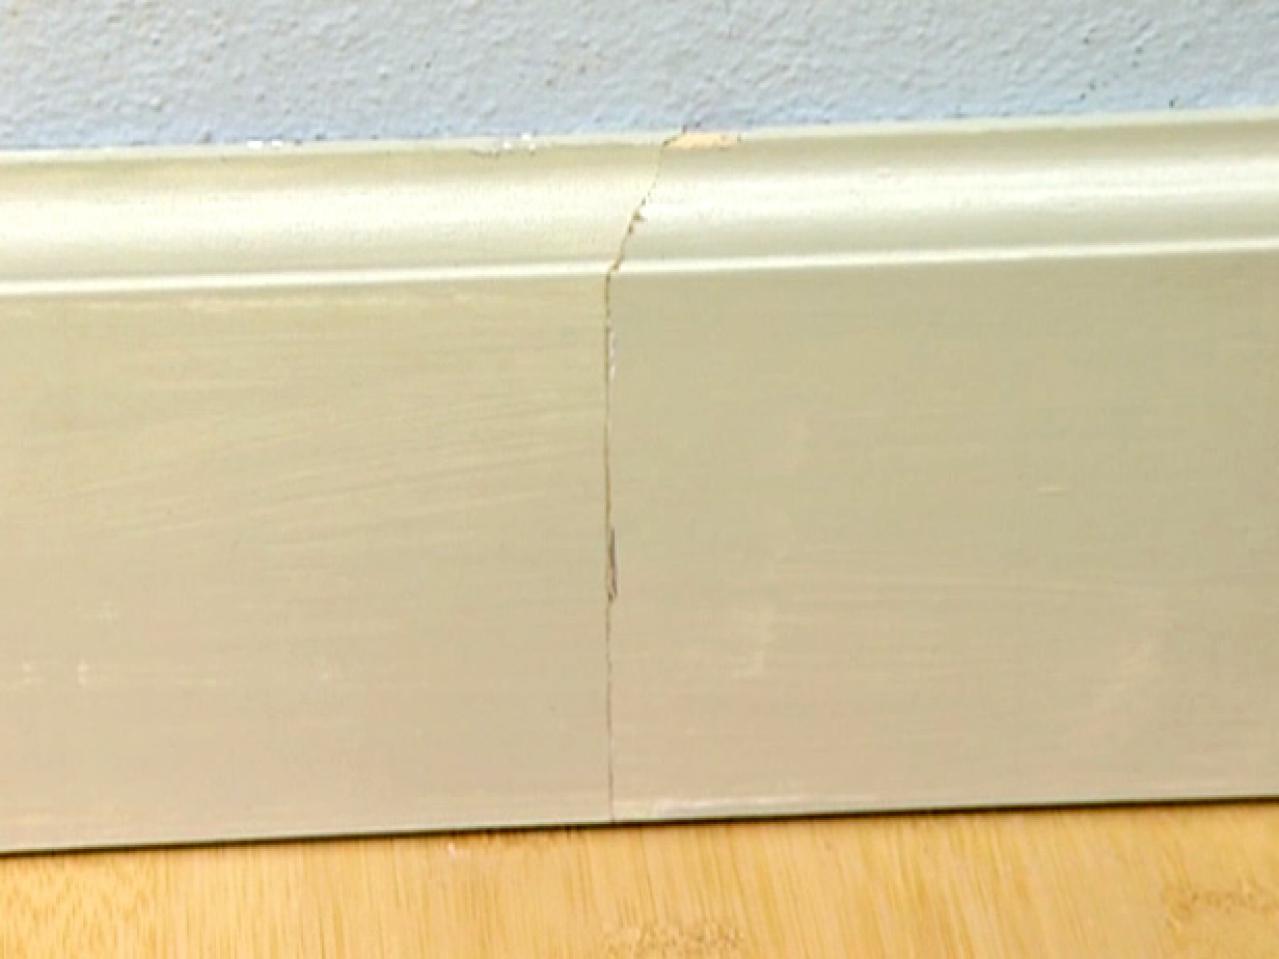
How To Install Baseboards How Tos Diy from diy.sndimg.com Then remove the jig, and make your first set of cuts. If the join it too tight, use a sanding block to remove excess wood. Box joints are strong and attractive, and with the help of our router table box joint jig, they're also straightforward to make. Drill pilot holes for the screws in each board and apply carpenter's glue to the cut ends to help seal the joints. Doing so ensures a tight fit. With the shelves in place, add finish nails through the outside of the unit to hold the shelves in place (image 3). Place both boards back against the wall and check the join. The result is an extremely strong, totally concealed joint.
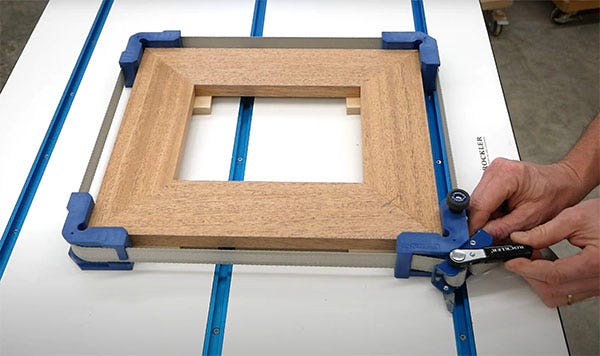
Box joints are strong and attractive, and with the help of our router table box joint jig, they're also straightforward to make.
Slide the fence against the blocks, and tighten it in place. Jun 27, 2017 · assemble the base using wood screws. If your router table lacks a miter slot, lengthen the gauge blocks so the hardwood runner rides against the front edge of the tabletop. The result is an extremely strong, totally concealed joint. Doing so ensures a tight fit. If the join it too tight, use a sanding block to remove excess wood. Start by affixing the top to the two side panels using wood glue and finish nails (image 1). Wood putty, also called plastic wood, is a substance used to fill imperfections, such as nail holes, in wood prior to finishing.it is often composed of wood dust combined with a binder that dries and a diluent (thinner), and, sometimes, pigment. Then, install the shelves by putting glue in the rabbet joints and sliding the shelves into the joints, one shelf at a time (image 2). Then remove the jig, and make your first set of cuts. After you move the fence to change bits, remount the jig in the miter slot. Box joints are strong and attractive, and with the help of our router table box joint jig, they're also straightforward to make. Once the fit is good, apply a thin bead of wood glue to mitered edges and nail in place with finishing nails.
Drill pilot holes for the screws in each board and apply carpenter's glue to the cut ends to help seal the joints. Slide the fence against the blocks, and tighten it in place. If your router table lacks a miter slot, lengthen the gauge blocks so the hardwood runner rides against the front edge of the tabletop. Then, install the shelves by putting glue in the rabbet joints and sliding the shelves into the joints, one shelf at a time (image 2). Jun 27, 2017 · assemble the base using wood screws.
Five Tips For Making Mitered Picture Frames from www.rockler.com Drill pilot holes for the screws in each board and apply carpenter's glue to the cut ends to help seal the joints. Slide the fence against the blocks, and tighten it in place. Then remove the jig, and make your first set of cuts. Place both boards back against the wall and check the join. Once the fit is good, apply a thin bead of wood glue to mitered edges and nail in place with finishing nails. If your router table lacks a miter slot, lengthen the gauge blocks so the hardwood runner rides against the front edge of the tabletop. Start by affixing the top to the two side panels using wood glue and finish nails (image 1). Box joints are strong and attractive, and with the help of our router table box joint jig, they're also straightforward to make.
If your router table lacks a miter slot, lengthen the gauge blocks so the hardwood runner rides against the front edge of the tabletop.
Then remove the jig, and make your first set of cuts. Box joints are strong and attractive, and with the help of our router table box joint jig, they're also straightforward to make. Doing so ensures a tight fit. Wood putty, also called plastic wood, is a substance used to fill imperfections, such as nail holes, in wood prior to finishing.it is often composed of wood dust combined with a binder that dries and a diluent (thinner), and, sometimes, pigment. Place both boards back against the wall and check the join. If your router table lacks a miter slot, lengthen the gauge blocks so the hardwood runner rides against the front edge of the tabletop. Jun 27, 2017 · assemble the base using wood screws. After you move the fence to change bits, remount the jig in the miter slot. The result is an extremely strong, totally concealed joint. Once the fit is good, apply a thin bead of wood glue to mitered edges and nail in place with finishing nails. If the join it too tight, use a sanding block to remove excess wood. With the shelves in place, add finish nails through the outside of the unit to hold the shelves in place (image 3). Then, install the shelves by putting glue in the rabbet joints and sliding the shelves into the joints, one shelf at a time (image 2).
The result is an extremely strong, totally concealed joint. Then remove the jig, and make your first set of cuts. Jun 27, 2017 · assemble the base using wood screws. If the join it too tight, use a sanding block to remove excess wood. Doing so ensures a tight fit.
How To Fix Gaps In Mitered Joints In 3 Easy Steps To Make Window Trim Look Flawless Diy With Christine from diywithchristine.com Then, install the shelves by putting glue in the rabbet joints and sliding the shelves into the joints, one shelf at a time (image 2). Once the fit is good, apply a thin bead of wood glue to mitered edges and nail in place with finishing nails. Box joints are strong and attractive, and with the help of our router table box joint jig, they're also straightforward to make. If the join it too tight, use a sanding block to remove excess wood. The result is an extremely strong, totally concealed joint. Then remove the jig, and make your first set of cuts. Drill pilot holes for the screws in each board and apply carpenter's glue to the cut ends to help seal the joints. If your router table lacks a miter slot, lengthen the gauge blocks so the hardwood runner rides against the front edge of the tabletop.
Drill pilot holes for the screws in each board and apply carpenter's glue to the cut ends to help seal the joints.
Place both boards back against the wall and check the join. After you move the fence to change bits, remount the jig in the miter slot. Start by affixing the top to the two side panels using wood glue and finish nails (image 1). Box joints are strong and attractive, and with the help of our router table box joint jig, they're also straightforward to make. Drill pilot holes for the screws in each board and apply carpenter's glue to the cut ends to help seal the joints. With the shelves in place, add finish nails through the outside of the unit to hold the shelves in place (image 3). Doing so ensures a tight fit. Wood putty, also called plastic wood, is a substance used to fill imperfections, such as nail holes, in wood prior to finishing.it is often composed of wood dust combined with a binder that dries and a diluent (thinner), and, sometimes, pigment. Then remove the jig, and make your first set of cuts. Jun 27, 2017 · assemble the base using wood screws. Then, install the shelves by putting glue in the rabbet joints and sliding the shelves into the joints, one shelf at a time (image 2). If your router table lacks a miter slot, lengthen the gauge blocks so the hardwood runner rides against the front edge of the tabletop. The result is an extremely strong, totally concealed joint.